

How to Use a Star Chart for Beginners
A star chart is one of the most fundamental tools in astronomy — and one of the most underused by beginners. Many new stargazers rely entirely on their phone, then wonder why everything looks washed out and they can’t see faint stars. Understanding how to use a proper star chart (and protect your night vision while doing it) is a skill that transforms your observing sessions.
This guide walks you through everything from scratch: what a star chart is, how to read one, and how to use it confidently under the real night sky.
What Is a Star Chart?
A star chart (also called a star map) is a diagram of the night sky as seen from Earth, showing stars as dots, constellations as connected patterns, and deep-sky objects like nebulae and galaxies as special symbols. Unlike a road map, a star chart shows the sky as you look up, which flips east and west compared to what you’d expect.
Star charts come in several forms, and the right one depends on what you’re trying to do.
Types of Star Charts
Planisphere (Rotating Star Wheel)
The planisphere is the go-to beginner tool, and for good reason. It’s a two-disc device — the lower disc shows the full star chart, and the upper oval window rotates to mask out the part of the sky below your horizon. Set the date and time on the dial, and it instantly shows every constellation visible above your horizon right now. No phone, no screen, no internet needed. Just hold it under your red flashlight and read the sky.
Monthly Sky Maps
Single-page charts published monthly by astronomy magazines like Sky & Telescope and Astronomy. Simple, seasonal, and great for planning what to look at in a given month. Free versions are available online, but be careful — many are not tailored to your latitude.
Sky Atlases
Multi-page books with detailed charts covering the entire sky down to faint magnitudes. The Pocket Sky Atlas by Roger Sinnott is the standard beginner recommendation — compact enough to bring to a dark site, comprehensive enough to use for years. Step up to the Sky Atlas 2000.0 (designed by Wil Tirion) when you want to go deeper.
Smartphone Apps
Apps like SkySafari, Stellarium, and Star Walk use your GPS and phone sensors to display the real-time sky over your live camera view. Extremely powerful — but a glowing screen destroys your night vision. If you use an app outside, enable red-screen mode (on Android: Color Correction → Deuteranomaly; on iPhone: Accessibility → Color Filters). Better yet, use a printed chart at the eyepiece and keep the phone in your pocket.
How to Read a Star Chart
Star charts look intimidating at first, but once you understand the conventions they’re straightforward. Here’s what everything means:
Dot sizes = brightness. Larger dots represent brighter stars. The legend on your chart shows a magnitude scale (magnitude is the astronomical unit for brightness — lower numbers are brighter). Magnitude 1 stars are brilliant; magnitude 4–5 stars are barely visible from a suburban backyard.
Constellation lines. Dotted or solid lines connecting stars show the traditional constellation patterns. These lines are completely imaginary — they don’t appear in the sky. They’re just guides to help you learn the patterns.
Deep-sky symbols. Different shapes represent different object types. An elongated fuzzy ellipse = galaxy. A circle with a dot = globular cluster. A dotted circle = open star cluster. A small circle with rays = planetary nebula. Your chart’s legend will define each symbol.
East and West are flipped. On a star chart, east is to the LEFT and west is to the RIGHT. This is the opposite of a road map — but makes sense when you hold the chart overhead and look up, matching the sky you see.
The ecliptic. The curved dashed line running across many charts marks the ecliptic — the yearly path of the Sun through the constellations. The planets always appear near this line. If you see a bright object close to the ecliptic that isn’t shown on the chart, it’s almost certainly a planet.
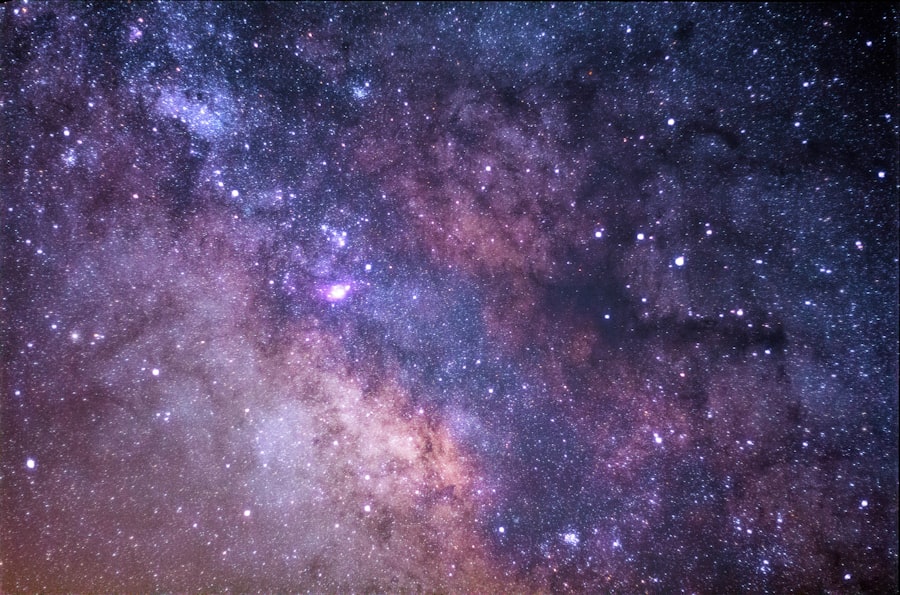
The Milky Way band. Many charts show a faint shaded band across the sky — this is our own galaxy seen edge-on. Under dark skies, it’s visible to the naked eye as a hazy river of light.
Our Recommended Planisphere

Explore Scientific Tirion Double-Sided Planisphere (ES-TPS018)
$19.99
This is the planisphere we recommend for beginners across the United States. It covers latitudes from 0° to 60° North — the full contiguous U.S. — so it works wherever you are. It’s designed by Wil Tirion, the same cartographer behind the legendary Sky Atlas 2000.0, which means the star positions and constellation boundaries are as accurate as they get. The double-sided design is important: most single-sided planispheres distort stars near the edges of the map significantly. By splitting the sky across two sides, Tirion minimizes that distortion and gives you a truer picture of the sky. Set the rotating dial to your date and time, hold it under a red flashlight, and you immediately know what’s up. It’s low-tech on purpose — no batteries, no glowing screen, no destroyed night vision. This is the first sky tool we recommend to any beginner.
Get Your Free Beginner Stargazing Starter Guide
Weekly tips, gear guides, and night sky inspiration. No spam — unsubscribe any time.
Step-by-Step: Using a Star Chart Outside
Here’s the exact process to follow on your first night out with a star chart.
Step 1: Set your planisphere before you go outside. If you’re using a planisphere, set the date and time window while you’re still indoors under normal light. Find today’s date on the outer ring and rotate it to align with your current local time on the inner ring. Account for Daylight Saving Time if it’s in effect — if the chart doesn’t show DST, subtract one hour from the displayed time.
Step 2: Let your eyes dark-adapt for 15–20 minutes. Go outside and give your eyes time to adjust to the darkness before trying to read the sky. Your eyes contain two types of light receptors — cones (for color, work in bright light) and rods (for low light). The rods take 20–30 minutes to reach full sensitivity. This process is called dark adaptation, and a single flash of white light resets it completely. Stay away from porch lights, phone screens, and car headlights.
Step 3: Face south. For beginners in the United States, south is your starting point. Most star charts are drawn with the southern sky at the center because that’s where the most constellations rise and set throughout the year. Hold your chart with ‘South’ at the bottom edge, facing south.
Step 4: Find your anchor constellation. Look for something you already recognize. In winter, Orion is unmistakable — three stars in a row (the Belt) with bright Betelgeuse reddish at top-left and Rigel blue-white at bottom-right. In spring and summer, find the Big Dipper high in the northern sky. In summer, the Summer Triangle (Vega, Deneb, Altair) dominates the overhead sky. Once you spot your anchor, find it on the chart and you’re oriented.
Step 5: Read under red light only. Use a red-light flashlight to read your chart. Red light doesn’t trigger the rod cells in your eyes that are responsible for dark adaptation, so you can read the chart without losing your night vision. This is one of the most important habits in astronomy — experienced observers are almost religious about it.
Step 6: Navigate by star-hopping. With your anchor constellation identified, use the chart to hop to other constellations and objects nearby. Trace the lines between stars on the chart, estimate the angular distances between them, and match them to what you see in the sky.
The Art of Star-Hopping
Star-hopping is how experienced observers navigate to faint objects without computerized equipment. The technique is simple: start at something bright and obvious, then use star patterns to step your way toward your target, one recognizable pattern at a time.
A classic example everyone starts with: finding Polaris (the North Star) using the Big Dipper. Find the two stars at the far end of the Dipper’s cup (Dubhe and Merak — the “Pointer Stars”). Draw an imaginary line through them and extend it about five times the distance between them. That line points almost exactly to Polaris. Once you’ve done this once, you’ll always know where north is.
Another beginner hop: finding the Andromeda Galaxy from the Great Square of Pegasus. Locate the Great Square (a large, obvious square of four stars visible in autumn), then step two stars north from the top-left corner — and you’re right at the Andromeda Galaxy, visible to the naked eye as a faint smudge from dark skies. Through binoculars or a telescope, it’s breathtaking.
Star-hopping through a telescope works the same way, but you’ll use higher-magnification views and need to match the narrower field of view to the chart. This is where a good star atlas becomes essential — zoom in to the area you’re working in and navigate star by star.
Dark Adaptation: The Hidden Skill in Stargazing
Most beginners underestimate how much dark adaptation affects what they can see. Under fully dark-adapted eyes, the human visual system can detect stars roughly 100 times fainter than under light-adapted conditions. That’s the difference between seeing 2,000 stars and seeing 10,000 stars with the naked eye. Through a telescope, it’s the difference between seeing a galaxy as a faint smear and seeing it with structure and extent.
The rules for protecting dark adaptation:
1. Use only red light for reading charts and adjusting equipment.
2. Keep your phone in your pocket. If you must use it, lower the brightness to minimum and enable red-screen mode.
3. Stand well away from any lit windows, streetlights, or car headlights.
4. Give yourself at least 15 minutes after going outside before serious observing. 30 minutes is better.
Read our full guide to light pollution and finding dark skies for more on how to get the most from your eyes and your telescope.
Common Beginner Mistakes with Star Charts
Using white light. The single most common mistake. One glance at a bright phone screen or flashlight, and your 20 minutes of dark adaptation is gone. Always use red light.
Trying to identify every star at once. Start with the big, obvious patterns — the constellations. Don’t try to memorize 50 stars on night one. Learn 3–5 anchor constellations well, then gradually add more each session.
Holding the chart wrong. For beginners, the instinct is to hold the chart like a road map — north up, east right. But when you hold it overhead to match the sky you’re looking at, east flips to the left. Face south, hold the chart with south at the bottom, and match what you see.
Expecting the sky to look like the chart. Star charts are idealized. In the real sky, the Milky Way drowns faint stars from suburban locations, planets aren’t shown (they move), and atmospheric conditions affect how bright everything appears. The chart is a guide, not a photograph.
Not pairing a planisphere with a telescope. A planisphere is perfect for learning the constellations, but once you’re hunting specific objects through the eyepiece, you’ll want a more detailed atlas. Many observers use a planisphere to plan the night and orient themselves, then switch to a star atlas for detailed eyepiece work.
Red light at the eyepiece — protecting dark adaptation while reading the chart.
What to Get Next
Once you’re comfortable with a planisphere and basic star-hopping, the natural next steps are:
A beginner telescope to start resolving objects your eyes can only detect as smudges. See our beginner telescopes collection for curated picks at every budget, or read the full telescope buying guide.
A red-light flashlight from our star maps and flashlights collection — an essential companion to any star chart.
An understanding of light pollution and how to find darker skies near you — read our guide to light pollution and dark sky parks.
Frequently Asked Questions
What is a star chart and how do I use one?
A star chart is a map of the night sky showing stars, constellations, and deep-sky objects. To use one, face south and hold the chart with South at the bottom — the stars on the chart should match what you see above you. Set the date and time if using a planisphere, find a recognizable anchor constellation, then navigate from there.
What is the easiest star chart for beginners?
A planisphere is the most beginner-friendly option. Set the rotating dial to your date and time and it shows exactly which constellations are visible above your horizon right now. The Explore Scientific Tirion Planisphere ($19.99) covers the entire United States (0–60° North) and is designed by master cartographer Wil Tirion for accuracy beginners and experienced observers alike can rely on.
How do I orient a star chart with the actual sky?
Face south and hold the chart with South at the bottom. On a star chart, east is to the LEFT and west is to the RIGHT — the opposite of a road map, because you’re looking up instead of down. Find one or two obvious constellations you recognize to anchor your orientation, then use the chart to navigate from there.
What is star-hopping in astronomy?
Star-hopping is the technique of navigating the night sky by moving from one bright star or constellation to the next, using distances and angles shown on a star chart. A classic example: find Polaris (the North Star) by extending the line of the two pointer stars at the end of the Big Dipper’s cup about five times their separation. It’s the core navigation skill for both naked-eye and telescopic observing.
Can I use my phone instead of a printed star chart?
Yes — apps like SkySafari, Stellarium, and Star Walk are excellent tools. However, a glowing white phone screen destroys your dark-adapted night vision in seconds. If you use an app outside, enable red-screen mode. Many experienced observers prefer a red-light-illuminated printed planisphere at the eyepiece to protect their night vision entirely.
What is dark adaptation and why does it matter for stargazing?
Dark adaptation is the process your eyes go through as they adjust to darkness, allowing you to see fainter stars and objects. It takes 20–30 minutes for your eyes to fully dark-adapt, and even a brief flash of white light resets the process. Always use a red-light flashlight when reading star charts outside — red light doesn’t affect the rod cells responsible for night vision.